
Imagine capturing the exact dimensions of any physical object and turning it into a digital model within minutes. That’s the power of 3D scanning technology, and it’s becoming more accessible than ever. A 3D scanner captures the shape, size, and sometimes color of real-world objects, converting them into digital 3D models that you can edit, analyze, or reproduce.
This comprehensive guide covers everything from basic scanning workflows to professional-grade equipment. You’ll learn about different scanner types, accuracy requirements, software compatibility, and how to choose the right solution for your specific needs.
Key Takeaways
- 3D scanners use laser triangulation, structured light, or photogrammetry to capture object geometry with accuracy ranging from 0.01mm to several millimeters.
- Industrial 3D scanners like Revopoint MetroX offer metrology-grade precision for CAD workflows, while budget options like Revopoint Inspire serve hobbyists effectively.
- The scanning workflow involves capture, alignment, meshing, texturing, and export to formats like STL, OBJ, or PLY for 3D printing and CAD integration.
- Professional 3D scanner software typically includes advanced features for mesh processing, while 3d scanner app solutions provide convenient mobile scanning capabilities.
- Scanner selection depends on object size, required accuracy, portability needs, and budget constraints ranging from under $500 to over $50,000.
Understanding the 3D Scanning Workflow

The 3D scanning process follows a structured workflow that transforms physical objects into usable digital models. Each step plays a critical role in achieving accurate results. The entire process typically takes anywhere from minutes to hours depending on object complexity and desired quality.
Here’s how the end-to-end workflow operates across different scanner types and applications.
Capture Phase
The capture phase involves positioning your object and scanner for optimal data collection. Most scanners require multiple angles to capture complete geometry. You’ll need to consider lighting conditions, surface properties, and scanning distance during this stage.
Alignment and Registration
Raw scan data comes in separate chunks that need alignment into a single coordinate system. Registration algorithms match overlapping areas between scans. This step determines the overall accuracy of your final model.
Meshing and Processing
The aligned point cloud gets converted into a triangular mesh surface. Processing software fills gaps, reduces noise, and optimizes geometry. Quality settings here affect both file size and detail retention.
Texturing and Export
Color information gets mapped onto the 3D geometry if your scanner captures texture data. The final model exports to formats like STL for 3D printing, OBJ for general use, or specialized CAD formats. File format choice depends on your intended application.
Now let’s explore the different types of 3D scanning technologies and their specific strengths.
Major 3D Scanner Types and Technologies
Different scanning technologies excel in specific applications, each with distinct advantages and limitations. Understanding these differences helps you choose the right approach for your projects. Technology choice affects accuracy, speed, cost, and the types of objects you can successfully scan.
Laser Triangulation Scanners
Laser triangulation scanners project laser lines onto objects and calculate depth from the reflected light pattern. These systems offer excellent accuracy and work well on most opaque surfaces.
- Accuracy: 0.01mm to 0.1mm depending on model
- Best for: Industrial inspection, reverse engineering, quality control
- Limitations: Struggle with reflective or transparent materials
- Speed: Fast capture with real-time processing
Structured Light Scanners
Structured light systems project patterns of light and analyze deformation to calculate surface geometry. This technology balances speed and accuracy for many applications.
- Accuracy: 0.02mm to 0.5mm typical range
- Best for: Product design, art preservation, medical applications
- Advantages: Fast capture, good detail resolution
- Drawbacks: Sensitive to ambient light, requires controlled environment
Time-of-Flight (LiDAR) Scanners
LiDAR scanners measure distance by calculating light travel time to objects. These systems excel at capturing large environments and outdoor scenes.
- Range: Several meters to kilometers
- Applications: Architecture, construction, surveying
- Accuracy: Millimeter to centimeter level
- Benefits: Long range, works in various lighting conditions
Photogrammetry Solutions
Photogrammetry reconstructs 3D models from multiple photographs using specialized algorithms. Many 3d scanner app solutions use this approach for smartphone-based scanning.
- Equipment: Standard cameras or smartphones
- Cost: Lowest barrier to entry
- Accuracy: Variable, depends on camera quality and technique
- Flexibility: Can handle very large objects and scenes
Understanding accuracy requirements and technical specifications helps narrow down your scanner options effectively.
Accuracy, Resolution, and Technical Specifications
Technical specifications determine whether a scanner meets your project requirements and quality standards. Accuracy and resolution specifications often get confused, but they measure different aspects of scanner performance. Understanding these metrics helps you compare options and set realistic expectations for your scanning projects.
Professional 3d scanner models typically specify both point accuracy and volumetric accuracy across their working range.
Accuracy vs Resolution
- Accuracy: How close measurements are to true dimensions
- Resolution: Smallest detail size the scanner can distinguish
- Point spacing: Distance between individual measurement points
- Repeatability: Consistency across multiple scans of the same object
Surface Material Limitations
Scanner performance varies significantly based on surface properties and material characteristics. Most scanning technologies struggle with certain material types.
- Problematic surfaces: Highly reflective metals, transparent glass, very dark materials
- Solutions: Anti-glare sprays, powder coating, specialized lighting
- Best surfaces: Matte finishes, neutral colors, textured materials
- Preparation: Some objects need surface treatment for optimal results
| Scanner Type | Typical Accuracy | Working Distance | Best Applications |
|---|---|---|---|
| Handheld Laser | 0.03-0.1mm | 0.3-1.5m | Reverse engineering, inspection |
| Structured Light | 0.02-0.5mm | 0.2-2m | Product design, art scanning |
| Desktop Scanner | 0.05-0.2mm | 0.1-0.5m | Small parts, jewelry, dental |
| Mobile Apps | 1-5mm | 0.5-3m | Basic modeling, reference scans |
Let’s examine the software ecosystem that powers these scanning systems and enables practical workflows.
Software Compatibility and File Formats
3D scanning software handles everything from data capture to final model export and integration with design workflows. Most scanners include proprietary software, but third-party options often provide advanced features and better integration capabilities. The software choice significantly impacts your workflow efficiency and final output quality.
Professional 3d scanner systems typically support multiple software options for different workflow requirements.
Scanning and Processing Software
- Manufacturer software: Optimized for specific hardware, usually included
- Third-party options: GOM Inspect, Polyworks, Geomagic
- Open source: CloudCompare, MeshLab for basic processing
- CAD integration: Direct plugins for SolidWorks, Fusion 360, Rhino
Common File Formats
Different applications require specific file formats for optimal compatibility and feature support. Format selection affects file size, quality retention, and downstream workflow options.
- STL: Standard for 3D printing, mesh only
- OBJ: Widely supported, includes texture mapping
- PLY: Point clouds and meshes with color data
- STEP/IGES: CAD-native formats for engineering
- 3MF: Microsoft 3D format with material properties
Mobile and App-Based Solutions
3d scanner app solutions have improved significantly with better smartphone cameras and processing power. These apps use photogrammetry or structured light from device screens to capture geometry.
- Popular apps: Polycam, Scaniverse, 3D Scanner App
- Device requirements: LiDAR-equipped phones perform better
- Limitations: Lower accuracy, limited object size range
- Advantages: Immediate availability, no additional hardware cost
Now let’s walk through a practical scanning scenario to see how these concepts work together.
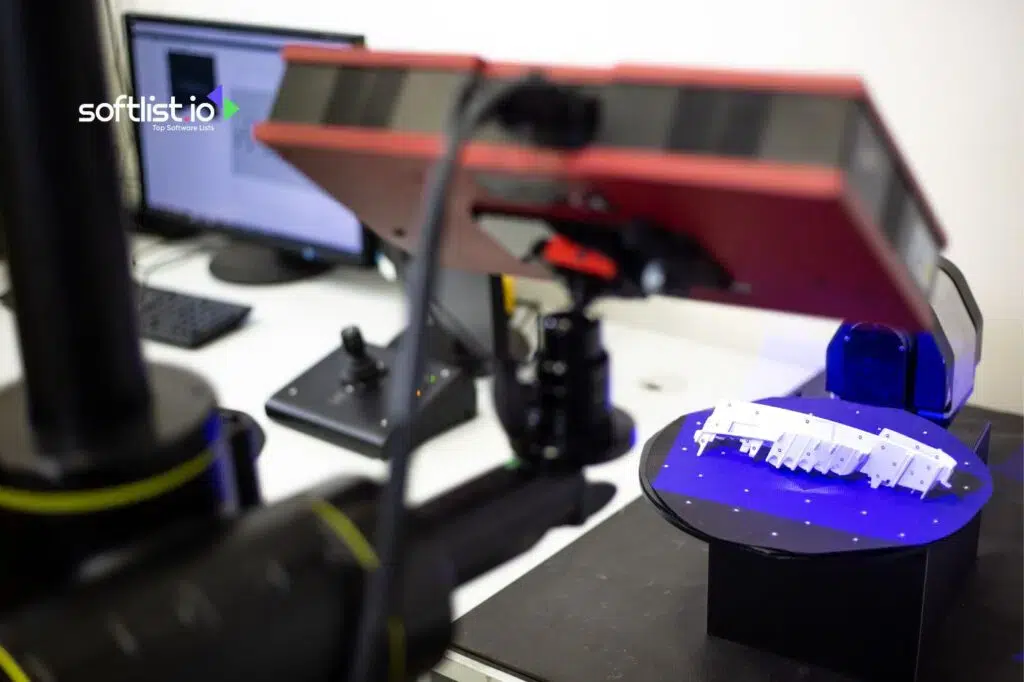
Step-by-Step Scanning Demo Scenario
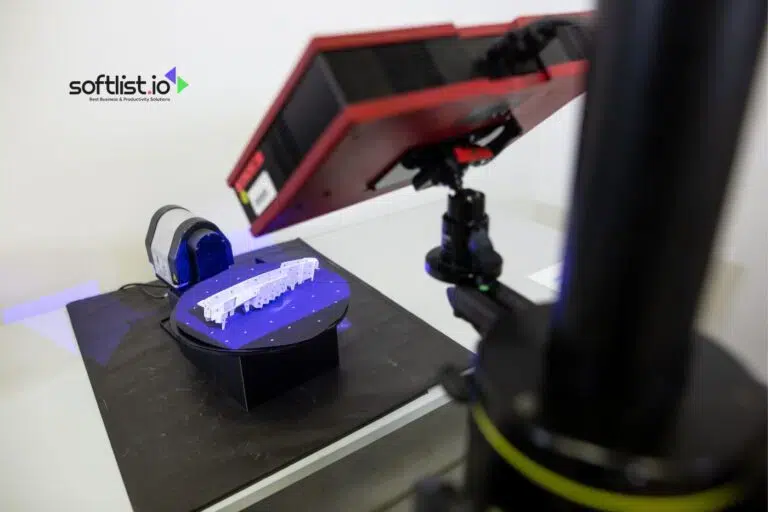
This practical example demonstrates scanning a mechanical part for reverse engineering using a handheld structured light scanner. The process illustrates common challenges and solutions you’ll encounter in real projects. Following this workflow helps establish good scanning habits and troubleshooting skills.
The scenario uses a Revopoint MetroX scanning a automotive bracket for CAD reconstruction.
Preparation and Setup
- Object preparation: Clean the part and check for reflective surfaces
- Environment setup: Ensure adequate lighting and stable positioning
- Software configuration: Set resolution and accuracy parameters
- Calibration check: Verify scanner calibration before starting
Scanning Process
- Initial positioning: Start with the most detailed or critical surface
- Systematic coverage: Move scanner smoothly maintaining 20-30cm distance
- Overlap management: Ensure 30-50% overlap between scan passes
- Real-time monitoring: Watch for gaps or problem areas during capture
- Multiple angles: Reposition object to capture hidden surfaces
Post-Processing Steps
- Alignment review: Check registration quality and fix misalignments
- Mesh generation: Convert point cloud to solid mesh surface
- Quality inspection: Identify and repair holes or artifacts
- Optimization: Reduce polygon count while preserving detail
- Export preparation: Choose appropriate format for intended use
Understanding different use cases and budget considerations helps you select the right scanning solution.
Buyer’s Guide: Matching Scanners to Use Cases
Scanner selection depends on balancing performance requirements with budget constraints and workflow needs. Different applications prioritize accuracy, speed, portability, or ease of use in varying combinations. Making the right choice requires understanding your primary use case and growth plans.
Let’s break down the best 3d scanners by category and application focus.
Budget Categories and Recommendations
- Under $500: Revopoint Inspire, smartphone apps with LiDAR
- $500-$2000: Revopoint POP 3, Creality CR-Scan Ferret
- $2000-$10000: Revopoint MetroX, Creality CR-Scan Raptor
- $10000+: Shining3D EinScan series, industrial solutions
Application-Specific Recommendations
Different scanning applications have distinct requirements that favor certain technologies and price points. Matching your primary use case to scanner capabilities ensures better results and value.
3D Printing Workflows
- Best choices: Revopoint POP 3, Creality Otter for detailed work
- Key features: STL export, mesh repair tools, size flexibility
- Accuracy needs: 0.1-0.5mm sufficient for most prints
- Workflow integration: Direct slicer software compatibility
CAD and Engineering
- Professional options: Revopoint MetroX, Shining3D EinScan Pro HD
- Critical features: High accuracy, CAD software integration
- File formats: STEP, IGES support for parametric modeling
- Measurement tools: Built-in inspection and comparison features
| Use Case | Recommended Scanner | Key Features | Price Range |
|---|---|---|---|
| Hobbyist 3D Printing | Revopoint Inspire | Easy use, STL export | Under $500 |
| Professional CAD | Revopoint MetroX | 0.01mm accuracy, CAD integration | $3000-5000 |
| Industrial Inspection | Shining3D EinScan HX2 | Metrology grade, reporting | $15000+ |
| Mobile/Field Work | 3D Scanner App + LiDAR phone | Portability, immediate results | $0-50 |
Geographic and Market Considerations
Scanner availability and support varies by region, particularly for specialized industrial models. Best 3d scanners uk market offers strong support for European brands and standards.
- Regional support: Consider local service and training availability
- Import considerations: Duties and shipping for international purchases
- Standards compliance: Industry certifications for regulated applications
- Currency factors: Exchange rates affect international purchases significantly
Even the best scanners encounter challenges that require troubleshooting knowledge and practical solutions.
Common Issues and Troubleshooting
3D scanning projects often encounter predictable challenges that experienced users learn to anticipate and resolve quickly. Understanding common problems and their solutions saves time and improves scan quality significantly. Most issues relate to environmental factors, surface properties, or technique rather than equipment failures.
Professional workflows include systematic approaches to identifying and resolving scanning problems efficiently.
Scanning Quality Issues
- Incomplete coverage: Systematic scanning patterns prevent gaps
- Noise and artifacts: Environmental control and proper distance management
- Poor registration: Adequate overlap and distinctive surface features
- Missing details: Resolution settings and multiple pass techniques
Surface-Related Problems
- Reflective surfaces: Anti-glare spray or powder coating solutions
- Transparent materials: Temporary coating or specialized lighting
- Very dark objects: Additional lighting or white powder treatment
- Complex geometry: Multiple positioning setups and patient technique
Technical and Software Issues
- Calibration drift: Regular recalibration and environmental stability
- Processing crashes: Memory management and file size optimization
- Export problems: Format compatibility and software updates
- Hardware connectivity: USB power management and driver updates
Environmental Factors
Scanning environment significantly affects results, particularly for optical scanning technologies. Controlling these factors improves consistency and reduces troubleshooting needs.
- Lighting conditions: Avoid direct sunlight and fluorescent flicker
- Vibration control: Stable surfaces and minimal movement
- Temperature stability: Allow equipment warm-up time
- Background interference: Clean, contrasting backgrounds work best
Let’s address the most frequently asked questions about 3D scanning technology and applications.
Frequently Asked Questions
These common questions address fundamental concepts and practical concerns that new users typically encounter when exploring 3D scanning technology. Understanding these basics helps you make informed decisions and set appropriate expectations for your projects. The answers reflect current technology capabilities and industry best practices.
What Is a 3D Scanner?
A 3D scanner captures the physical shape and dimensions of real-world objects, converting them into digital 3D models. These devices use various technologies like laser triangulation, structured light, or photogrammetry to measure surface geometry. The resulting digital models can be used for 3D printing, CAD design, quality inspection, or archival purposes.
What Is a 3D LiDAR Scanner?
3D LiDAR scanners use laser pulses to measure distances by calculating light travel time to objects and back to the sensor. LiDAR excels at capturing large environments, outdoor scenes, and architectural spaces with high accuracy. These systems work well in various lighting conditions and can measure distances from meters to kilometers depending on the specific technology.
What Software Works With 3D Scanners?
Most 3D scanners include proprietary software for capture and basic processing, but many support third-party applications for advanced workflows. Popular options include GOM Inspect for metrology, Geomagic for reverse engineering, and direct CAD integration with SolidWorks or Fusion 360. Open-source alternatives like CloudCompare and MeshLab provide basic processing capabilities at no cost.
What Is the Point of 3D Scanning?
3D scanning enables digital preservation, reverse engineering, quality control, and rapid prototyping workflows that would be difficult or impossible with traditional measurement methods. Applications include creating replacement parts without original drawings, inspecting manufactured components for defects, preserving cultural artifacts, and generating 3D models for virtual reality or gaming applications.
What Are the Types of 3D Scanners?
The main types include laser triangulation scanners for high accuracy, structured light scanners for balanced speed and precision, time-of-flight LiDAR for long-range applications, and photogrammetry solutions for large objects or budget-conscious users. Each technology offers distinct advantages in terms of accuracy, working distance, speed, and cost considerations.
Essential 3D Scanning Glossary
Technical terminology in 3D scanning can be confusing for newcomers, but understanding key terms helps you communicate effectively with vendors and interpret specifications accurately. These definitions focus on practical concepts you’ll encounter in real projects. Familiarity with this vocabulary improves your ability to evaluate options and troubleshoot issues.
- Point Cloud: Raw collection of 3D coordinate points captured by the scanner
- Mesh: Connected triangular surfaces that form the final 3D model
- Registration: Process of aligning multiple scans into a single coordinate system
- Triangulation: Method of calculating distances using geometric relationships
- Structured Light: Projected patterns used to determine surface geometry
- Photogrammetry: 3D reconstruction from multiple photographs
- Volumetric Accuracy: Measurement precision across the entire working volume
- Point Spacing: Distance between individual measurement points
- Working Distance: Optimal range between scanner and object
- Field of View: Angular coverage area of the scanning system
- Metrology: Science of measurement, referring to highest accuracy standards
- Reverse Engineering: Creating CAD models from existing physical objects
Understanding these concepts and practical applications prepares you to take the next steps in your 3D scanning journey.
Next Steps and Getting Started
Starting your 3D scanning journey requires matching technology to your specific needs and budget while building skills through hands-on experience. Begin with clear project goals and realistic expectations about learning curves and initial results. Success comes from understanding both technical capabilities and practical limitations of different scanning approaches.
Consider starting with entry-level equipment or 3d scanner app solutions to develop technique before investing in professional-grade systems. This approach reduces initial costs while building the experience needed to evaluate advanced features effectively.
For immediate exploration, download a smartphone scanning app and practice on simple objects with good surface properties. This hands-on experience teaches fundamental concepts about lighting, positioning, and post-processing workflows. Graduate to dedicated hardware once you understand your specific requirements and workflow preferences.


